The plan was ready, the van was ready and I had scheduled some vacation days. I was early March and my favourite season would soon begin. So I was up for a challenge. Would I be able to build out my van in 21 days? To finish everything in such a short time was not realistic. But – the question was: how far would I get (while also having to work on half of the days)? Well, it was time for an experiment.
The places, where you can work on larger objects like vehicles, are rather limited in our surroundings. There are really nice ‘Co-Making Spaces’ and workshops on the outskirts of Vienna. But for the plan I had in mind, that wasn’t very feasible. I needed a place with space for my van and equipment, close to where I could sleep, work and eat. And it should not be too expensive. So – with limited time and budget – I had to find a different solution.
You can read the GERMAN version of this blog post on Surfingtrails.at
The Solution
I often spoke with my parents about the van build project. And as my dad was interested in joining the endeavour, we came to the conclusion that it would be best to work on the van at their place. My dad had all the tools needed and a lot of experience in refurbishing and craftsmanship. We would also have the space to work on multiple things simultaneously.
I had not seen my parents for a very long time (due to Covid and closed borders). But when the restrictions were partly lifted, it was time to take “Winnie” on a trip.
This visit was more than overdue and it was worth to go through the whole process of registration, testing and quarantine. I was extremely thankful to have that option and that I was finally able to see my parents again and start the van build with my dad.
The Prep and Search
I had collected a lot of information over the last years and already knew what I liked and what would definitely not work for me. First of all, I was looking for a van that was high enough to stand in. Not an easy task, as the classic L2H2 (medium length, medium hight) versions had become pretty popular. So over the last months (and years sporadically searching) I hadn’t found a vehicle that checked all the right boxes.
It was time to speed things up and take this search a bit more seriously. I signed up for different used car platforms (8!) and added search profiles and notifications for my ‘must haves’. I also spoke with friends, signed up in forums and fb groups to see what was on the market and to get a feeling for the whole process. It turned out that the market was quite competitive and those vans were often gone within hours of appearing online. So I had to come up with a strategy while further developing the plans for the layout and materials. The strategy was to keep an eye on everything, react quickly to new listings and get appointments for a test drive as soon as possible. With that in mind, I ended up driving to Styria, Corinthia and Upper Austria to check on potential vans and sellers.
The Van
Must-haves:
- Renault Master or Opel Movano (identically constructed)
- L2H2
- not older than 10 years (2010)
- not more than 150.000km
- price not higher than 13.000 EUR (which in the end had to be adjusted slightly to a higher amount)
- not less than 100 PS
- good overall condition
Nice-to-haves:
- not to many dents / scratches
- floor and side panels intact
- windows in the back and partition wall
- park distance control system
- airbags
- AC
- two keys
- maybe even: Bluetooth, USB port, multi-function steering wheel, hitch, cruise control
Both – the Master and the Movano – were my favourite choice since they are known to be reliable, having solid standard features, promising stats and recommendations from automobile clubs. On top, we had already gone on a camping trip with a Movano Camper Rental.
…
…
In the end, I found an almost perfect match in Upper Austria – a Opel Movano (2016 / L2H2) with 105 000km, Eco Mode, AC, cruise control and PDC but without windows (spoiler alert: we added some ourselves).
So the plan for March – getting it ready for the following season and adding some of the basics. Which ones? Well, keep on reading…
The Van Build Basics
I picked up the van one day before I was supposed to cross the border. I already knew that the car would need a thorough cleaning as it was used by a stonemason for the last five years. So the first steps of the van build were more than obvious.
We had to clean everything up, add some undersealing and rust proofing to protect it from decay. I also knew that we would need a proper low-temperature insulation to avoid freezing at night, which would also help to block some heat during the summer months. And of course – enough space for the bikes and the equipment as well as a comfortable bed.
All parts and equipment were ordered early in advance and we kept the fingers crossed that they would arrive on time (with material shortages on all levels) so that we could put everything into practice.
The rough layout plan looked like this:
…

…
Visual inspection and disassembly
It was a bit tempting to jump into the building part right away but we had to inspect all parts of the van to check if we oversaw any issues, rust or defects. Therefore, we disassembled all panels, the floor and all other parts that we wanted to renew or refurbish. The plan was to keep as much of the already existing material and re-use it for the build.
…
…
Cleaning the van
The thorough cleaning was a good starting point to get to know all the areas of the van. That way we could further polish our plan and come up with new ideas in case something wasn’t practical. The bare framework of the van was simple and straightforward. Some areas were difficult to reach but we had seen worse in other models and van build videos. This step took quite some time but in the end everything was clean and looked pretty good.
Step 2 of the Van Build in summary:
- cleaning (dusting, hoovering, sweeping)
- degreasing flat surfaces (with Armaflex cleaner) to prep them for the insulation
- removing dirt and recess of promotional stickers on the outside of the van
Rust protection, proofing and cavity sealing
We were not sure, what would appear under the existing flooring. Therefore, the anxiety level was high the night before the removal. We had seen so many vans with quite some rust and issues under the wooden panels. But we were very lucky. Under the flooring we only found a lot of dust and dirt, but nothing serious. There were just a few places with minimal rust that needed a bit of rust converter and anticorrosion paint (e.g. around the lashing points). So we had a pretty good base for our van build.
We also added another layer of protection by applying rust protection (cavity sealing) to the beams and pillars.
Sound and thermal insulation (with Alubutyl and Armaflex)
As insulation, we added a layer of Alubutyl on 40% of the plain surfaces that are prone to vibration to reduce the rattling sounds while driving. We also installed a layer of cold/thermal insulation with self-adhesive Armaflex AF (19mm, 6mm, 3mm) on all flat surfaces, beams and pillars. This helps to regulate the temperature and prevent excessive condensation inside the van.
…
For all links and materials drop us an email (info@shred.at)
…
…
Flooring
After cleaning and prepping the floor with rust proofing, we glued the wooden floor laths onto the metal floor which we later used to drill, fix and install our mountain bike sliders (heavy-duty racks). We also added the insulation in between and sealed everything with Armaflex tape.
We used the following materials:
- cleaner: Armaflex Cleaner
- glue: Sikaflex 221
- wooden laths: 3m x 24mm x 44mm
- insulation: Armaflex AF self-adhesive in 19mm and 6mm, Armaflex Tape in 3mm to combine and seal
Bike garage with heavy-duty racks
As it can be a bit of a hassle to quickly store bikes and equipment inside a vehicle, we decided to go for heavy duty racks with bike mounts.
We used the following materials:
- two heavy duty slides with lock-in/out – 1x 813mm (32″) und 1x 1270 mm (50″)
- wooden planks (160cm x 65cm and 110cm x 43cm)
- 9mm plywood for the edges
- PVC flooring
The sliders were mounted onto the flooring and bolted into the wooden floor laths. We also drilled through the metal floor on two points of each slide to be sure that the slides will not come loose under the weight of the bikes and equipment.
…
For all links and materials drop us an email (info@shred.at)
…
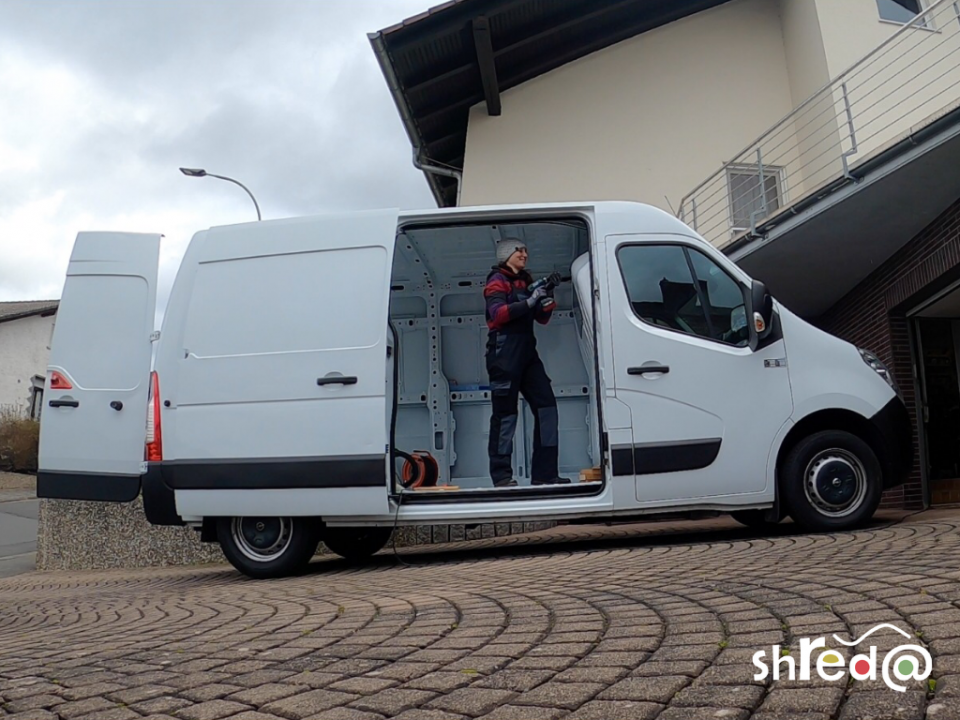
Cutting into the van
Cutting holes into the van was as exciting as it sounds. It felt a bit weird at the beginning but not bad at all. I already enjoyed working with those tools but hadn’t used them on metal so far. A new experience and pretty cool to complete another big step on the list. Getting the dimensions and central position right was harder than expected, as none of the margins were perpendicular or symmetrical and all the round edges of the rear doors were helping. But after some trial and error and a drilling test, we were ready to go.
With all the measuring and checking, time went by pretty fast and we had to postpone the installation of the windows until the next day. Even though I had an eye on the weather forecast and chose a good (warmer) day to take this step, nature had other things in mind. Overnight, the temperatures dropped abruptly. This was a bit of an issue since the sealant for the windows does not go well with the cold (below zero celsius). Therefore, we had to wait multiple days to insert the windows frames.
Installing the windows
Originally, I had hoped to find a van that already had windows in the back. But in the end, the rest of the features were more important than that. And it wasn’t a big issue. We knew that installing the windows on our own would also have some advantages. For one, I would be able to open them from the inside, which makes a huge difference for ventilation.
ToDos:
- drill-test
- cut out the holes to fit the windows (don’t forget to apply masking tape beforehand to avoid scratches)
- build wooden frame for the windows
- glue frame to aperture (Sikaflex 221)
- mount and seal windows (Sika Lastomer 710)
…
For all links and materials drop us an email (info@shred.at)
…
…
Upcycling the wood and side panels
When I bought the van, it had side panels to protect the inside of the vehicle from damage. We decided to keep the panels, upcycle and re-use them where we could. They consist of hard wood fiber (Funder Max Hartfaser migra) and just needed some sanding, fillings (for scratches & little holes) and new paint.
Building the bed frame
We constructed a bed out of 19mm spruce wood that would fit into the back of the van. We used two shelves on the side (with room for storage) and combined everything with one steel and two wooden bars.
As the bed is quite high, it is possible to store some of our bikes without removing the tires (e.g. road and gravel bikes).
…
…
Van Build part 2: storage and seating area
Of course the van build was not completely finished after 21 days, but we were very satisfied with the progress. I will summarize some of our work in separate posts and document further developments.
The next steps will include a layer of felt for the exposed walls, pillars and beams as well as adding a protective glazing to the wood and creating a sharper look. I will also add some kind of seating area that will function as additional storage for my kitchen stuff. Water will come out of a canister, electricity from a power station that is charged by a mobile solar panel. I will also build a toilet that functions like a cat litter box. :) Interested in more info on that? Stay tuned…
…
…
Thank you!
A big thank you goes out to my dad, who has helped me A LOT, allowed me to pick his brain and use his experience for the tasks at hand; my mom for her emotional and culinary support and our friend Wolfi who (as a former carpenter) gave us tips on working with the different kinds of wood and helped to build the bed frame. I am also very grateful for our friends, neighbours and relatives that had lent us their tools and supplied us with some materials that were hard to get during lockdown.
…